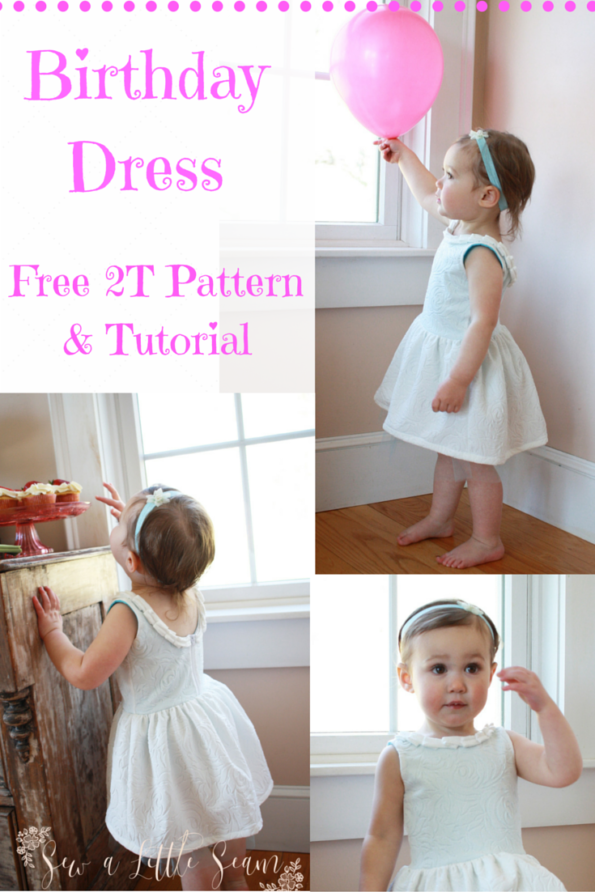
Turning Two – Free Birthday Dress Pattern
My little girl is growing up! No, I won’t get all sappy on you about time going too fast. Two is such a fun age and I love watching more of her personality come out every day. I do wish that it wouldn’t go so fast though.
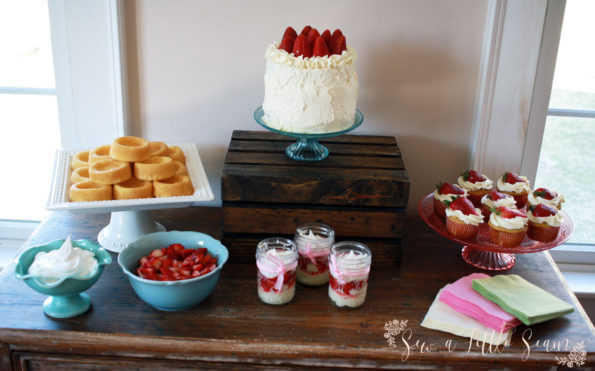
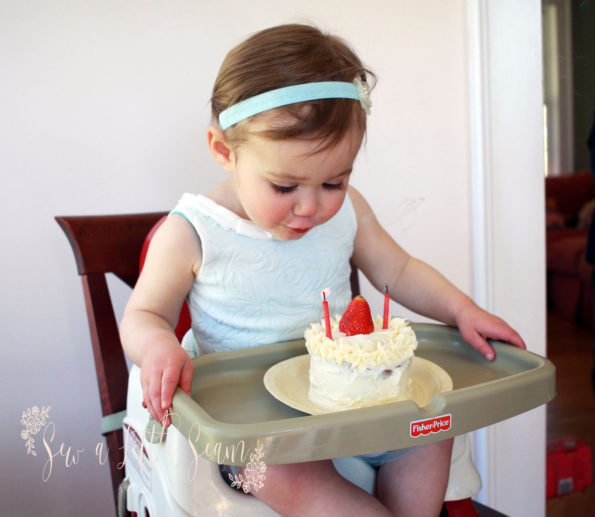
I’ve mentioned before how one of my other loves is party planning, and even though I scaled back this year, I still had a lot of fun putting together her strawberry themed party. Obviously dessert is my favorite part of any party…or day.
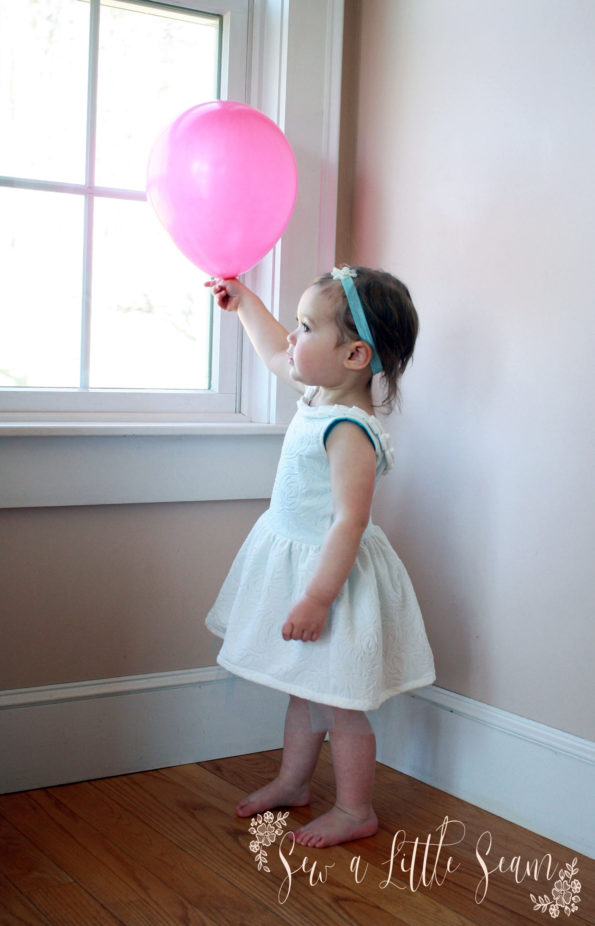
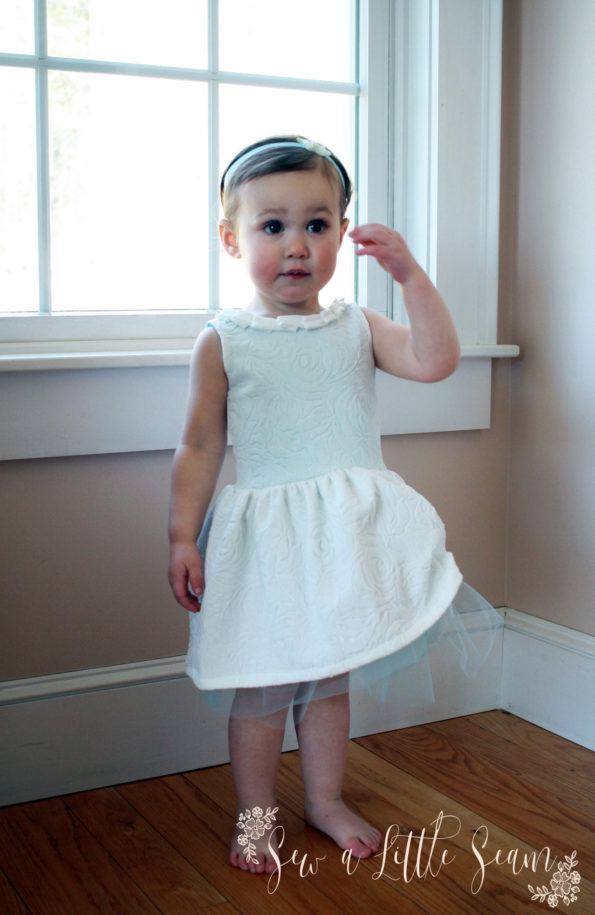
I also had a lot of fun making this dress! I saw a dress similar to this on Pinterest a little over a year ago that I’ve been waiting to make. And then I saw this perfect textured Liverpool on Knitpop and couldn’t wait to get started. I started out with some peplum versions, which I will talk about in another post, only because I have so many photos that I love.
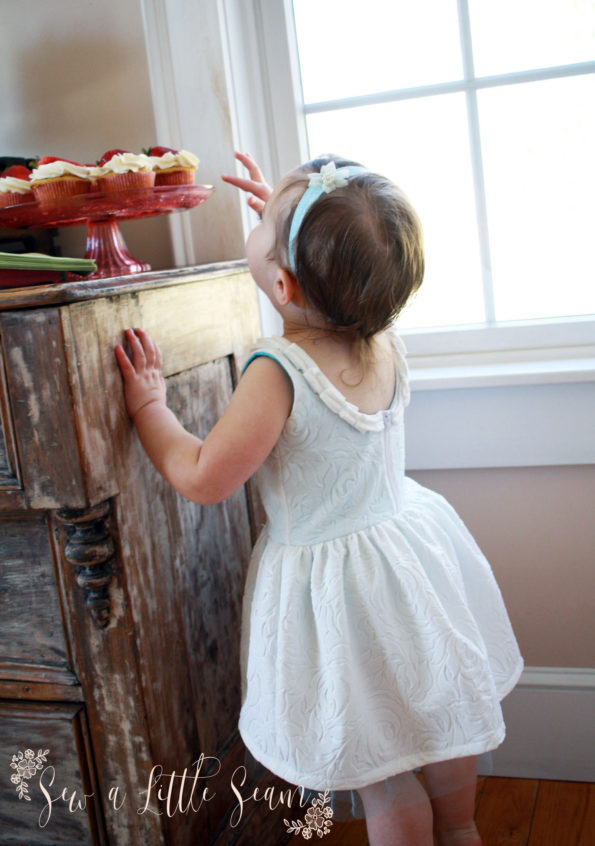
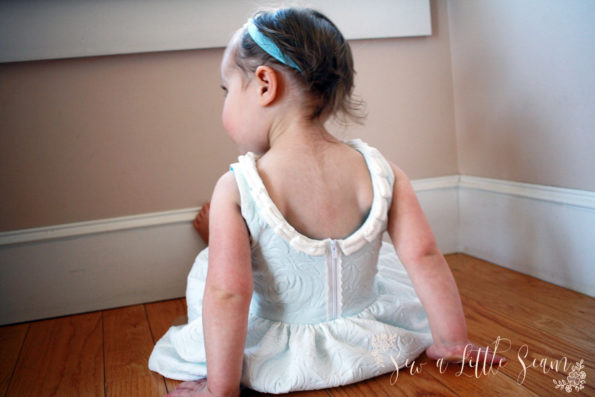
The dress features an exposed lace zipper, an optional pleated neckline, a scoop back, and a couple layers of tulle. It also has a lined bodice.
You can find a free 2T pattern on my shop page. It will fit a 20.5″ chest and 33″ to 35″ height.
*The pattern now comes with a sleeve option.
The tutorial is below.
What You Need:
A 7″ fashion lace (or similar) zipper
You can use either woven or a sturdy knit fabric for this pattern.
- 3/4 yard for the dress (outer fabric), 1/4 yard (lining)
- 1/2 yard for the peplum top (outer fabric), 1/4 yard (lining)
3/4 yard tulle (this will give you two layers for the skirt)
Getting Started:
Seam allowance is 3/8″ unless otherwise noted.
Cut your bodice pieces as noted on the pattern.
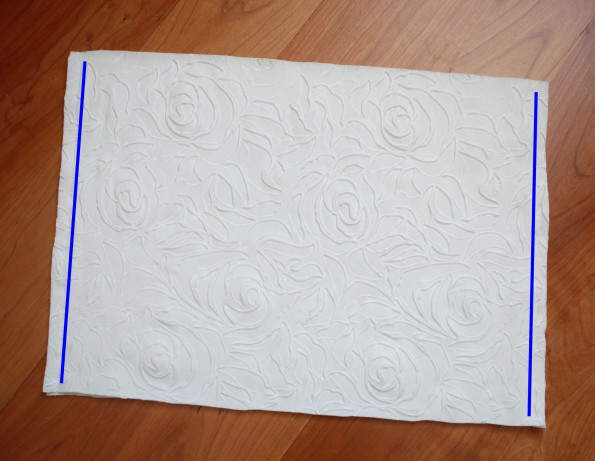
For the dress, cut two 24″ x 11″ rectangles from the main fabric. If you are using tulle, cut four rectangles of the same size.
For the peplum, cut two 16″ x 6.5″ rectangles.
If you are adding pleating around the neck, cut a 2″ strip of fabric 60″ in length. You can sew smaller pieces together if needed.
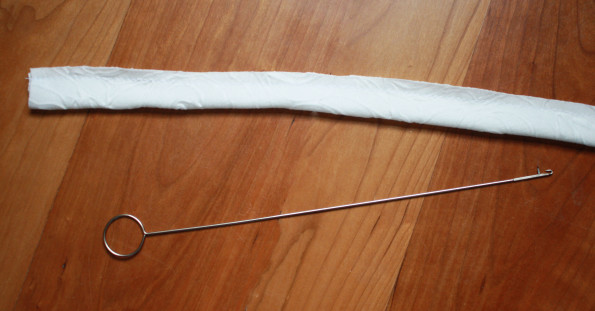
A loop turner such as this for turning the tube used for the pleated neckline.
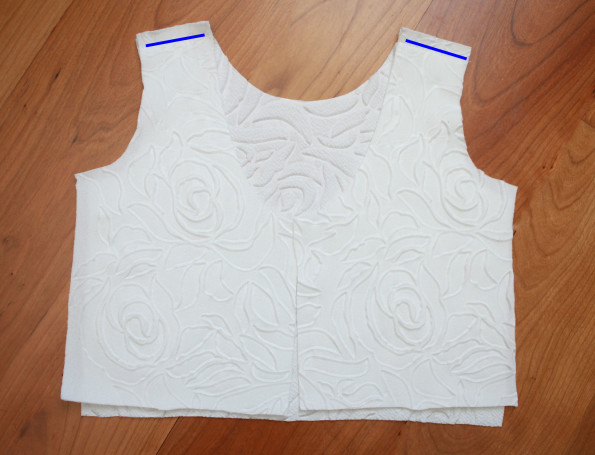
- Start by laying your front and back pieces right sides together. Pin and sew together along the shoulders. Press your seams to the back. Repeat for the lining, pressing your seams to the front.
2. Place your lining and outer fabric right sides together lining up the neckline and back inside edges. Match up your shoulder seams and corners and pin. Sew from the bottom of one back piece, around the neck and back down the other side. When you get to the corners on each side of the back, leave your needle in the fabric, lift your presser foot, and pivot your fabric around the corner so you have a nice sharp corner.
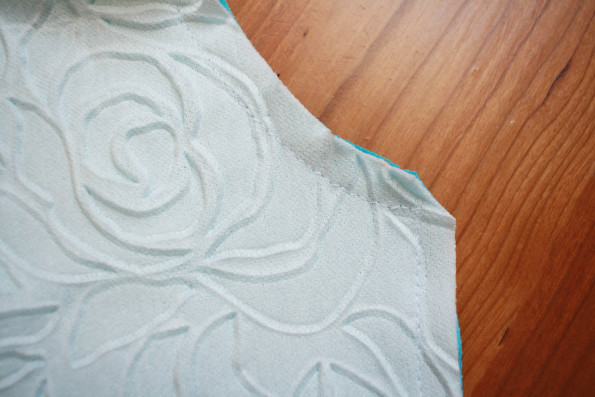
3. Trim the point off both corners, being careful not to get too close to your stitching. Trim the rest of your seam in half.
*If you are adding sleeves to your dress, skip to step 7.
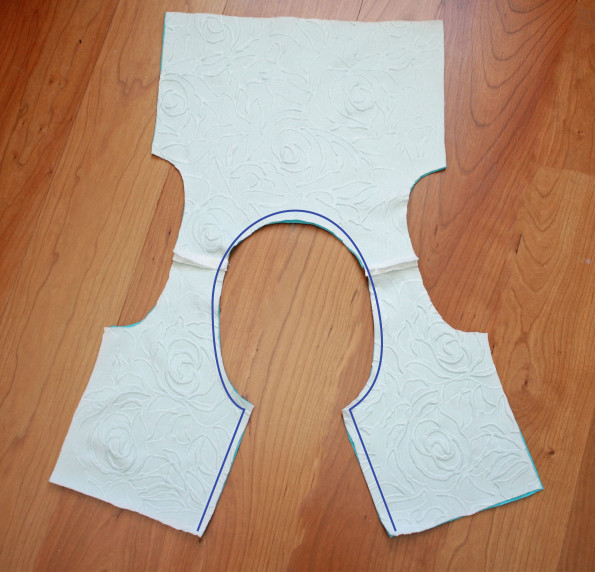
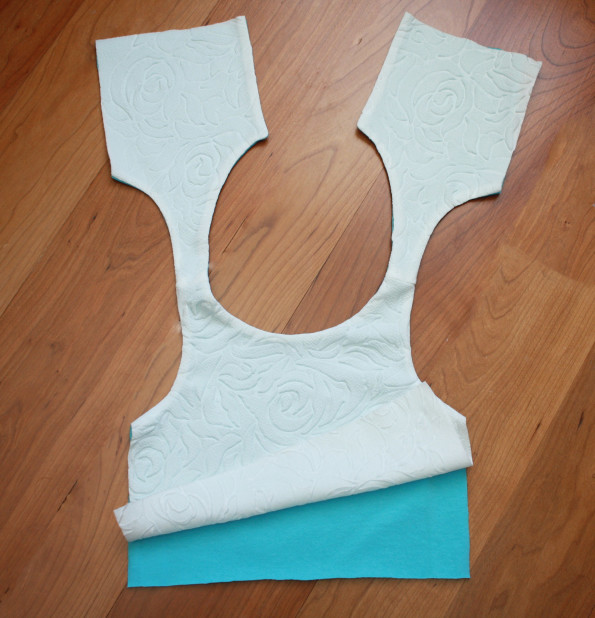
4. For the sleeveless version, line up your lining and outer fabric along the arms. Match up shoulder seams and edges and pin. Sew your lining and outer fabric together around the arm and trim your seam allowance in half. Push your two back pieces through the shoulders and pull right side out.
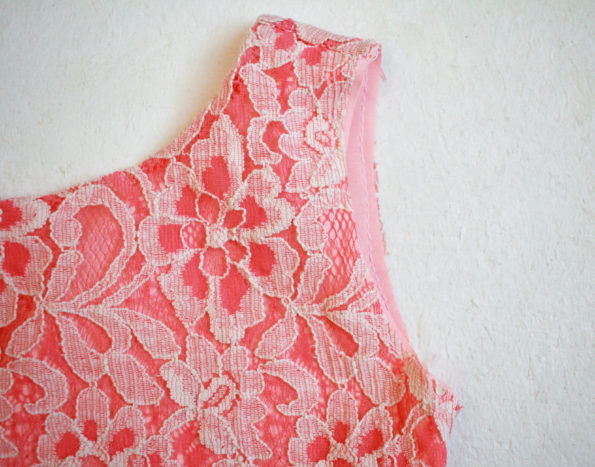
Once your fabric is right side out press all of your seams well, and if desired topstitch 1/8″ around the neck and arms.
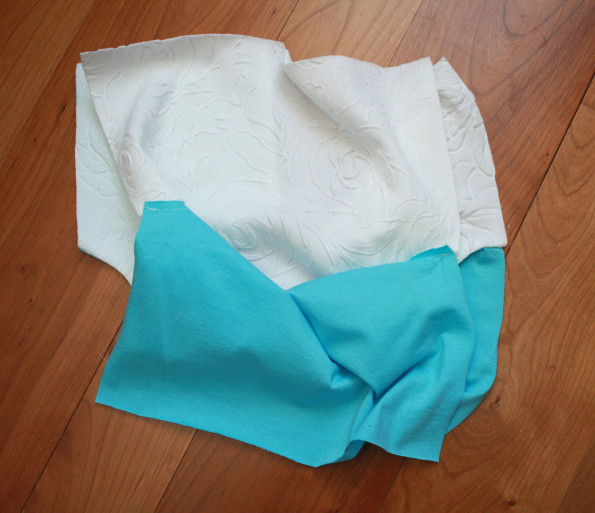
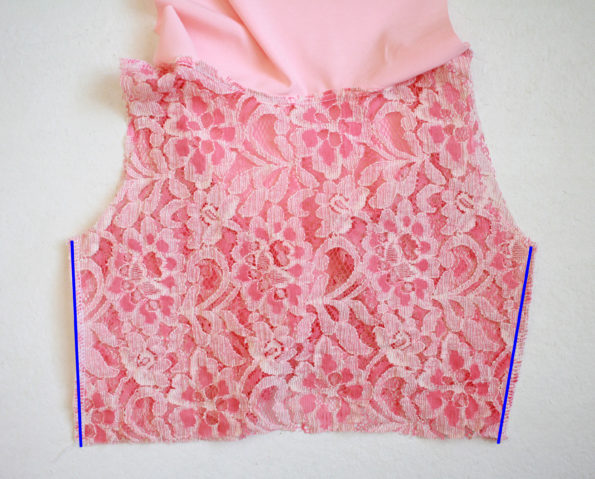
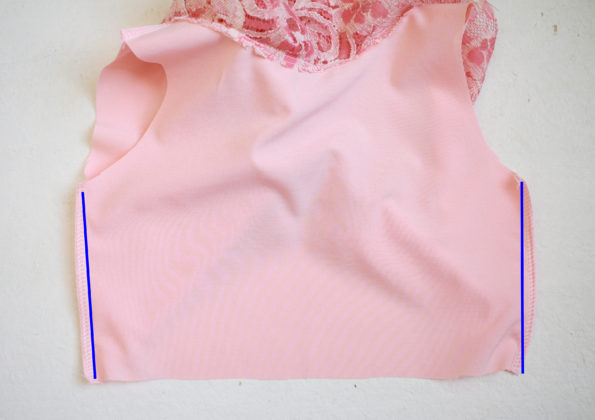
5. To sew the sides, fold your front main fabric up to match the back and pull the back lining down to match the front lining as shown above. Right sides should be together.
6. Pin and sew from the bottom of your main fabric to the bottom of your lining. Repeat on the other side. Turn right side out and press well. Skip to step 12 for adding the zipper.
Adding Sleeves
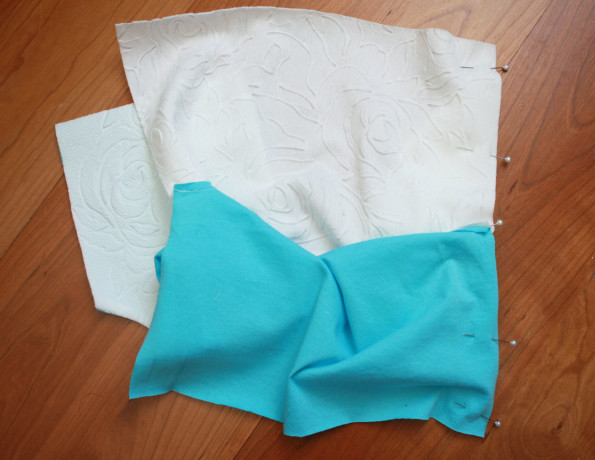
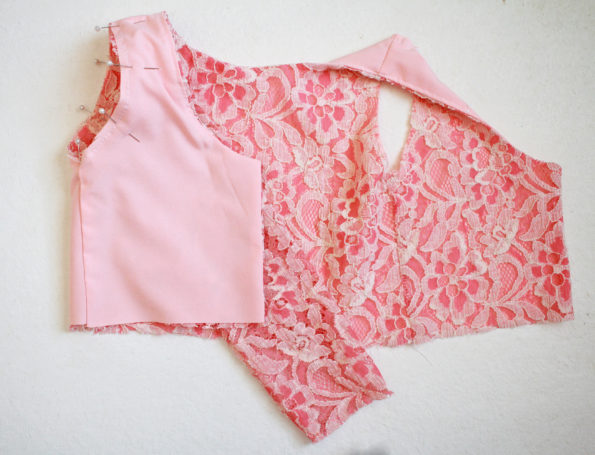
7. If adding sleeves, move your lining out of the way and with right sides together, sew the sides together.
8. Now repeat sewing the sides for the lining.
9. Baste your lining and main fabric together around the arm opening.
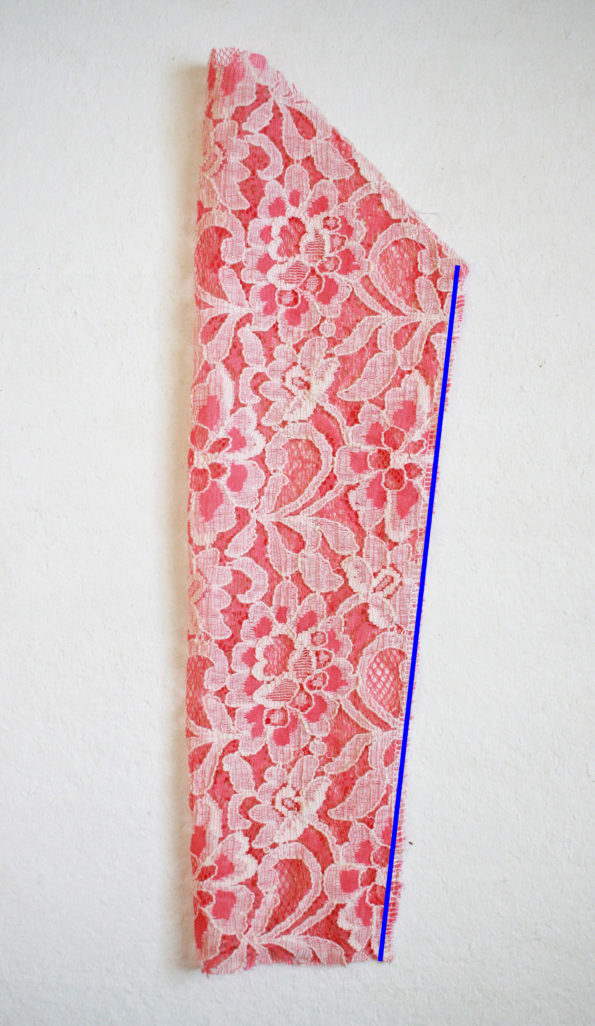
10. With right sides together, sew your sleeve together along the long side.
11. With right sides together, line up your sleeve in the opening, lining up the seams. Pin in place and then sew around the opening. Repeat for the other sleeve. Hem your sleeve by folding to the wrong side by 1/4″ and pressing. Fold another 1/2″ and press and then sew close to the inside fold. Continue with directions below for adding the zipper.
Adding the Zipper
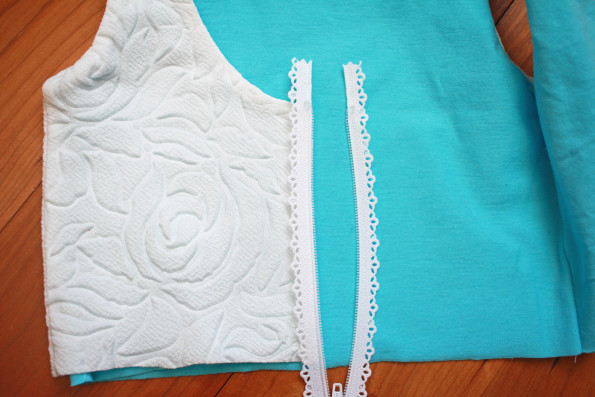
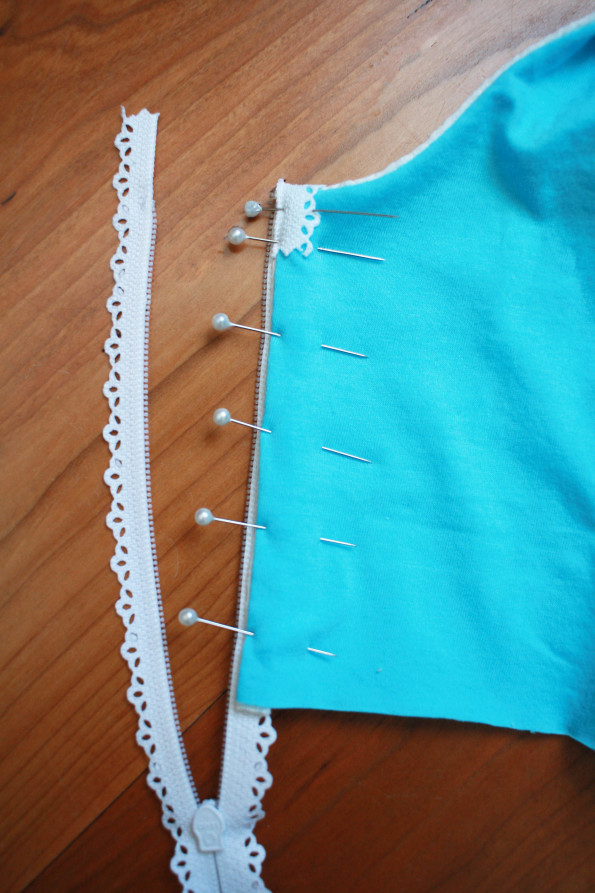
12. We are now going to install the zipper. Zip your slider down past the bottom of your dress, being careful not to pull the slider off. Place your zipper right side up on your dress and line up your zipper stops with the top of the dress back.
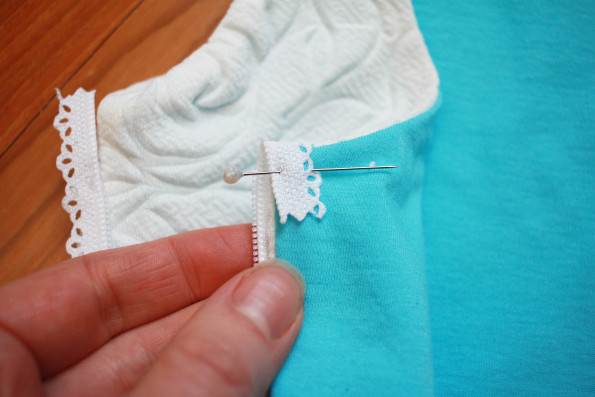
13. Fold the excess over the back and angle slightly to the inside of the dress. Pin in place.
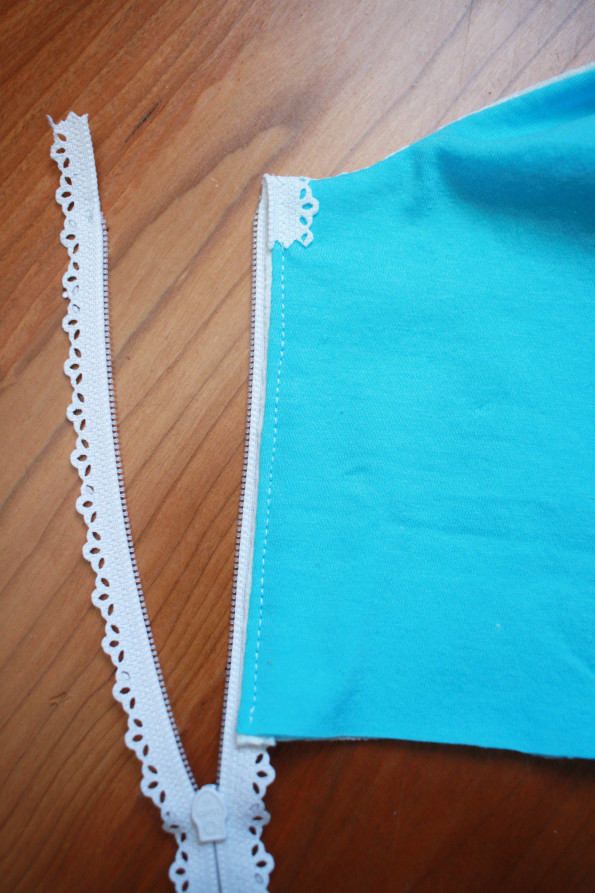
14. With your zipper teeth extending 1/8″ past your fabric, continue pinning down the back of the dress.
15. Starting at the top of the zipper, sew 1/8″ from the edge of your fabric using a straight stitch. Starting at the top is important, because if your fabric walks, it wont affect where your zipper falls at the top of the dress.
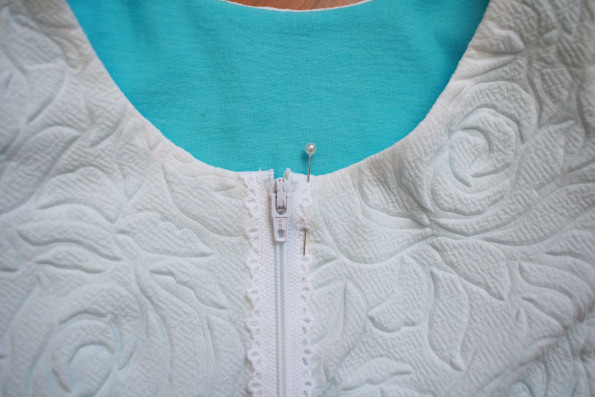
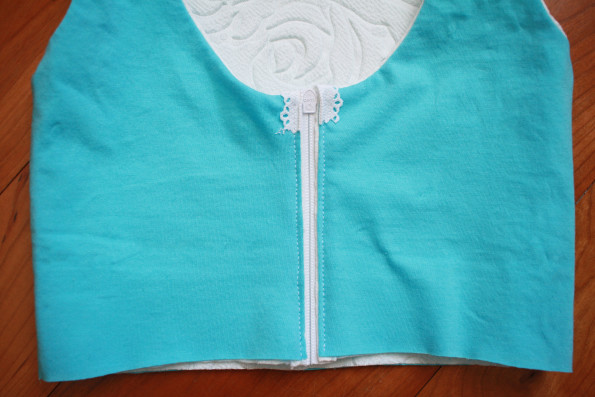
16. Zip your zipper and match the right and left sides so they are even. Fold the excess zipper tape over the back and pin, angling it slightly away from the teeth like the previous side. Continue pinning down the length of the zipper.
17. Sew this side of the zipper on the same way as the other side. Making sure you start at the top again.
Adding the Skirt
18. Place your skirt pieces right sides together. Pin and then sew along the short edges. Repeat for your tulle if you are using it. You should have two sets of skirts made from the tulle.
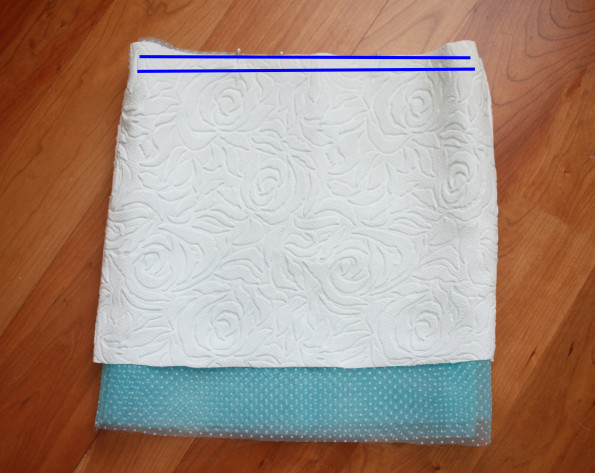
19. Place all three layers together one inside the other, match side seams, and pin around the top. Then starting at one side seam sew a gathering stitch (a straight stitch set at your longest length) 1/4″ from the top. Sew a second gathering stitch, 1/2″ from the top. (You can also gather each layer individually if you are using a heavier fabric or more layers of tulle).
20. Take one thread from both lines of stiches your just sewed and pull gently as you push your fabric along it. Gather your fabric until your skirt is the same width as your bodice. Even out your gathers so they look uniform across the skirt.
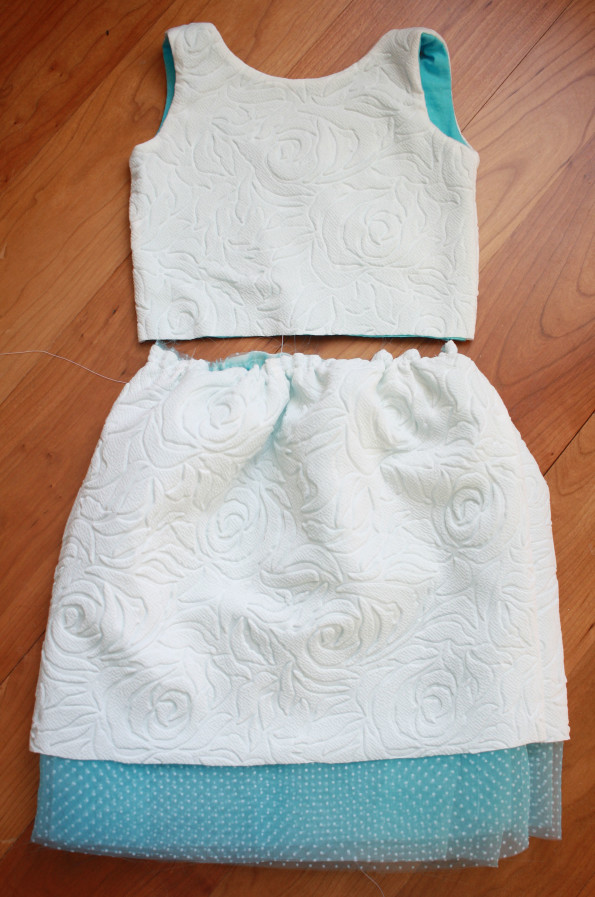
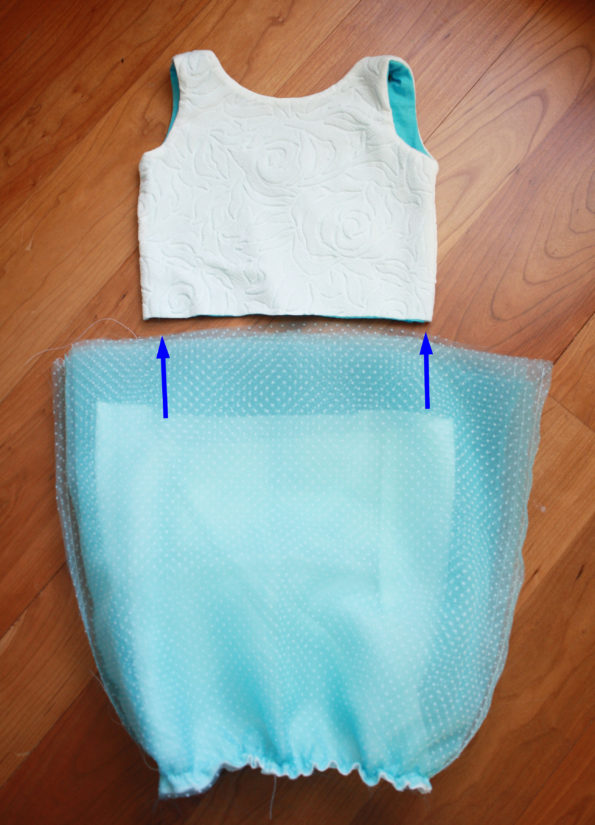
21. With your skirt inside out and your bodice right side out, insert your bodice between the skirts, matching raw edges. Line up your side seams and pin your bodice and skirt together. Sew your skirt to your bodice. Remove any gathering stitches that show from the right side.
Hem your skirt by folding your main fabric to the wrong side 1/2″ and pressing and then folding another 1/2″ and pressing. Sew along the top of the fold. Leave your tulle unhemmed, or use a small or rolled hem so the tulle will show below the main fabric.
Adding a Pleated Neckline
If making the pleated neckline, take your two inch strip of fabric and with right sides together, sew down the long side with 1/4″ seam allowance. Press your seam open. Using the loop turner, turn your fabric right side out.
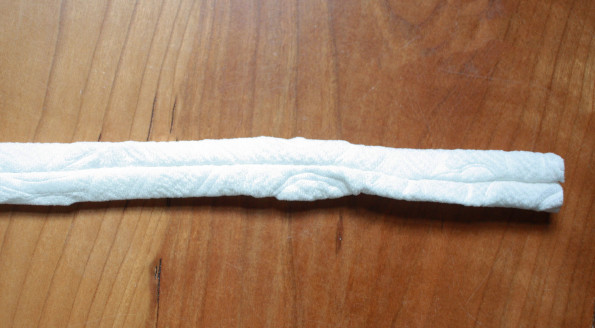
Press your tube flat with your seam centered on the top.
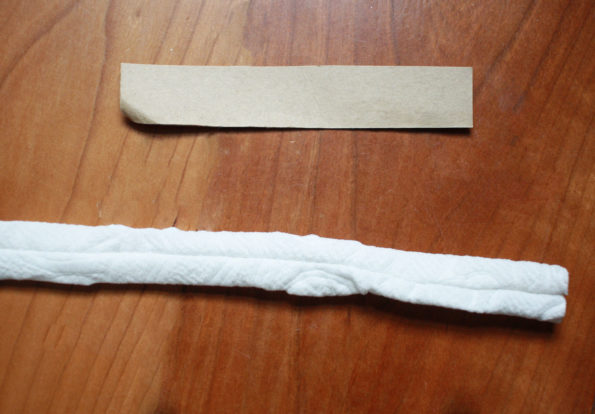
Cut a piece of cardboard 4″ x 3/4″
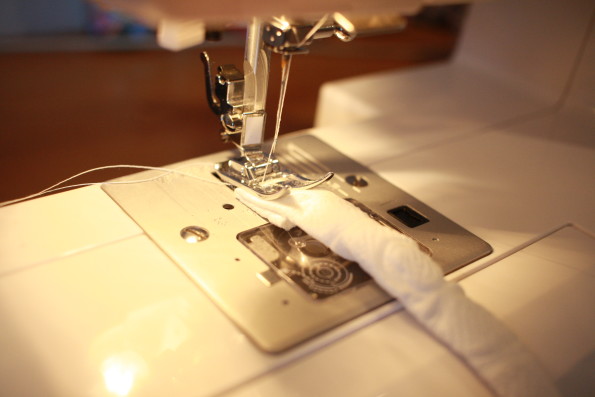
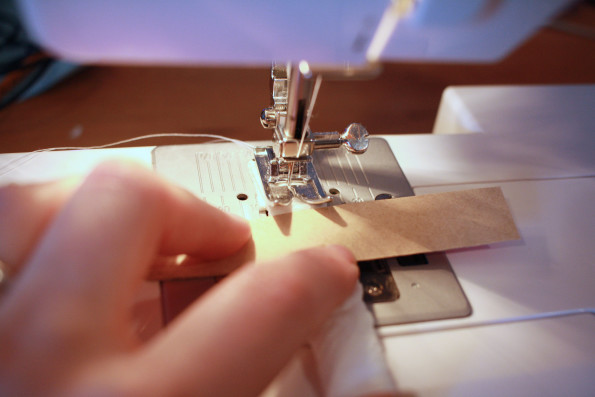
With your seam facing down, fold 3/4″ of fabric under and using a basting stitch sew down the center of the strip for 1/4″.
Place your piece of cardboard over your fabric where the end of your folded fabric starts.
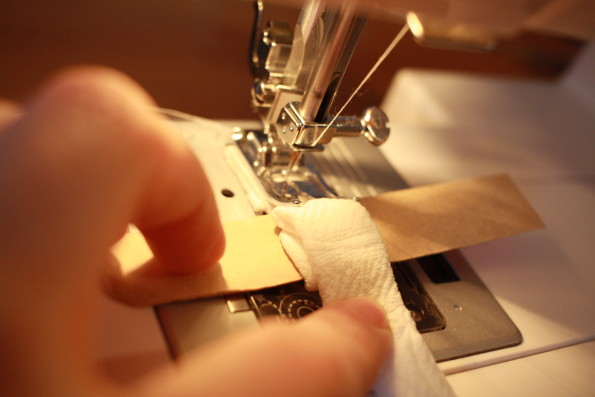
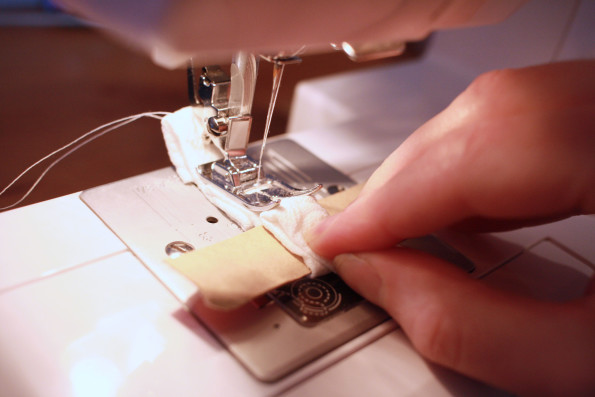
Fold your strip back over the cardboard. Holding onto your pleat, pull your piece of cardboard out and sew along the center until you are almost to the end of the pleat.
Fold your fabric back over the cardboard again, remove the cardboard, sew almost to the end of the pleat. Continue until you reach the end of your strip.
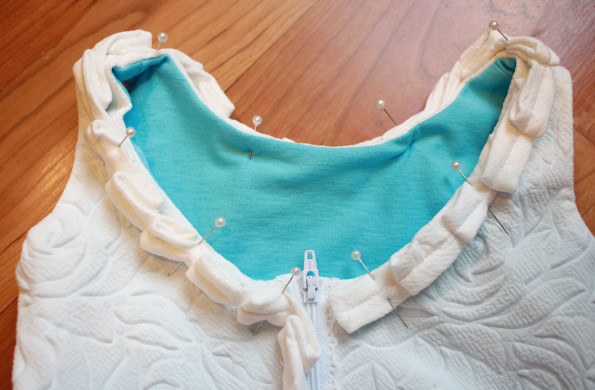
Starting on one side of the zipper, place the edge of your strip along th edge of your zipper tape. Start with the side you had folded under. Pin in place. Continue pinning your strip around the neckline of the dress, matching up the edge of the strip with the edge of your neckline. When you get back around to the other side of the zipper, use a seam ripper to unpick the stitching on the last pleat before your zipper. Fold this edge under like you did at the start and pin.
Starting at one end, sew down the middle of your strip, attaching it to the neckline.
You’re done! If you have any questions, email me at sewalittleseam@gmail.com.
Also I love to see your creations. Please share them on the Sew a Little Seam Facebook group.



Just adore your sewing tutorials, it’s so easy to follow and understandable. Thank you for being a great role model!